All Buttons and Controls in Bus Simulator Indonesia
Before playing the game, it is important to understand the buttons and controls because they make the gameplay smoother and more realistic. Here, the important buttons and controls of the game have been explained so that you can handle driving in a better way.
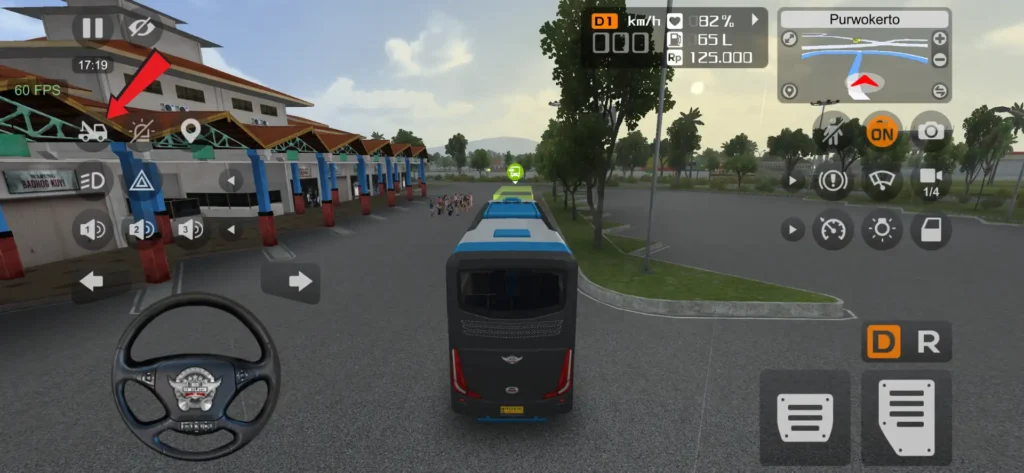
Tow Service
The first button on the left side is the Tow Service button. If your bus gets stuck somewhere or cannot move because of an accident, clicking this button will open a popup. From there, you can get tow service by spending 20,000 in-game coins or use this feature for free by watching an ad. After using this feature, your bus will be moved back onto the road so you can continue driving normally.
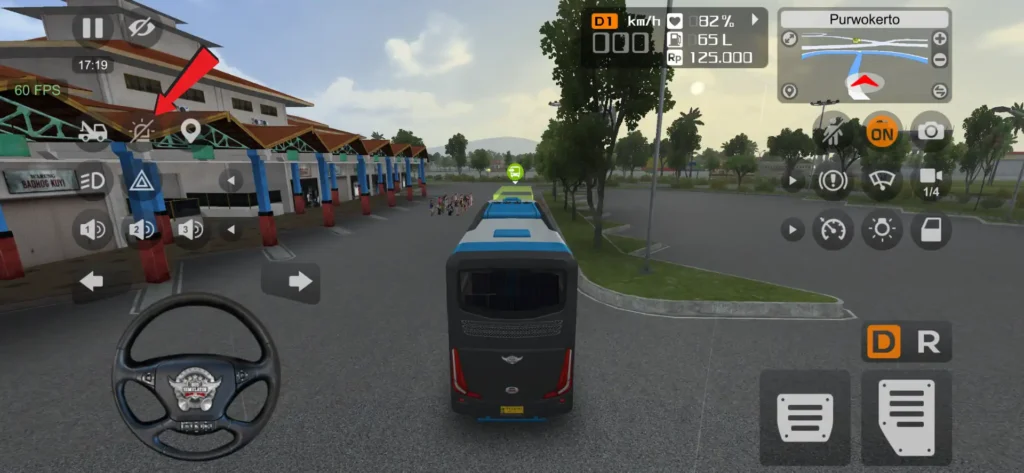
Decorative LED Lights
This button is used to turn the decorative LED lights around the bus on and off.
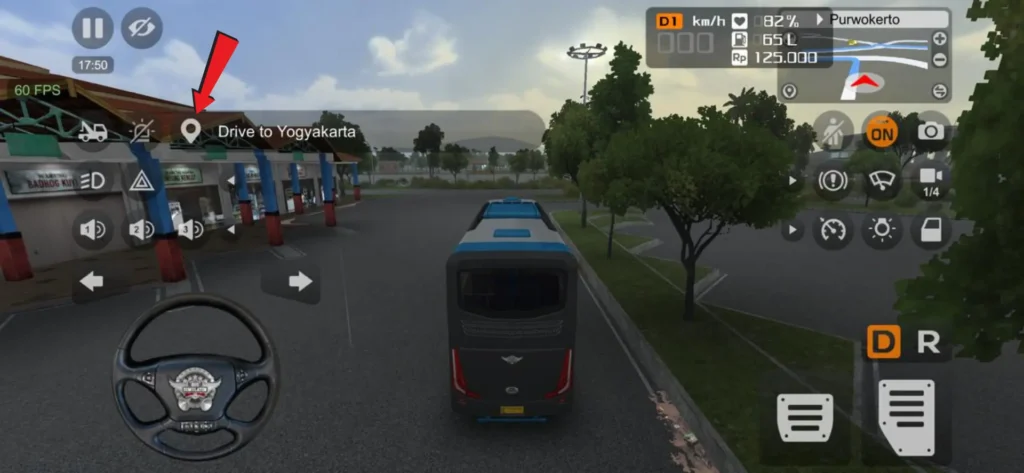
Location Navigation
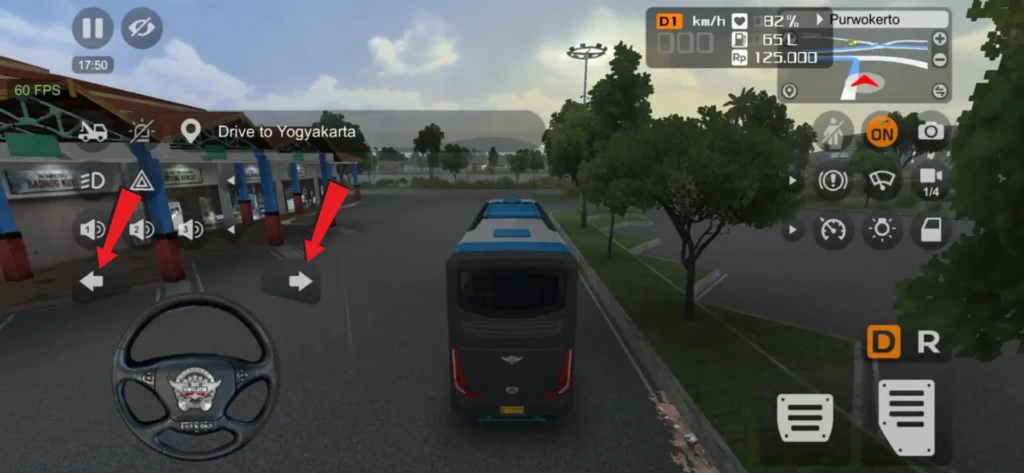
The third button on the left side is the Location Navigation option, which helps show your current destination and route during gameplay. After clicking on it, the name of the place you need to go to appears on the screen, making it easier to reach your destination.
Headlights
The first button in the middle row is used to turn the bus headlights on and off.
Hazard Indicators
The button next to the headlight control turns on all four indicators at the same time to alert nearby vehicles during emergencies or sudden stops.
Horn Controls
The buttons below the hazard indicators are used for different types of horn sounds. Players can use these horn options to alert nearby vehicles during driving.
Left and Right Indicators
The left and right indicator buttons are used while taking turns to alert nearby vehicles.
Complete Guide to Map Controls and Navigation
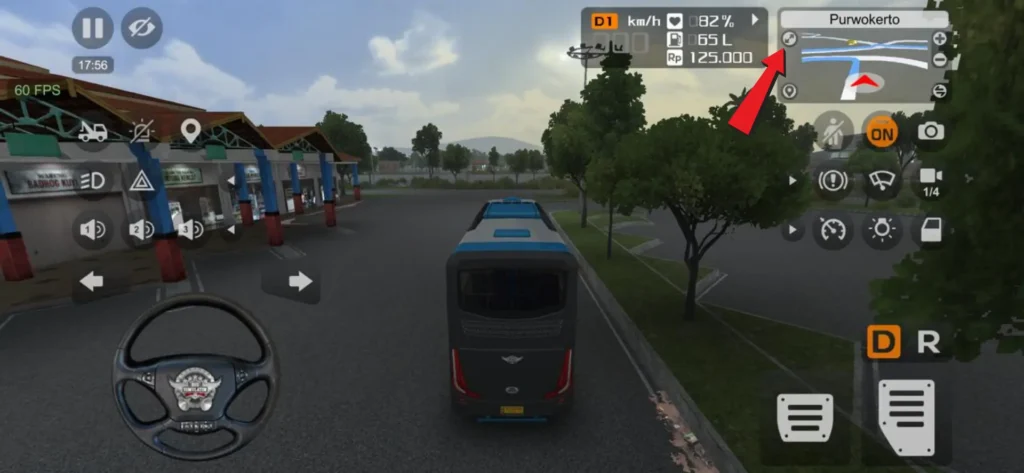
You can see different options around the map. On the left side, the upper option shows the mini map on the screen, which makes it easier to see the road while driving. If you need a petrol pump, service area, or any other place ahead, you can also see it on this map.
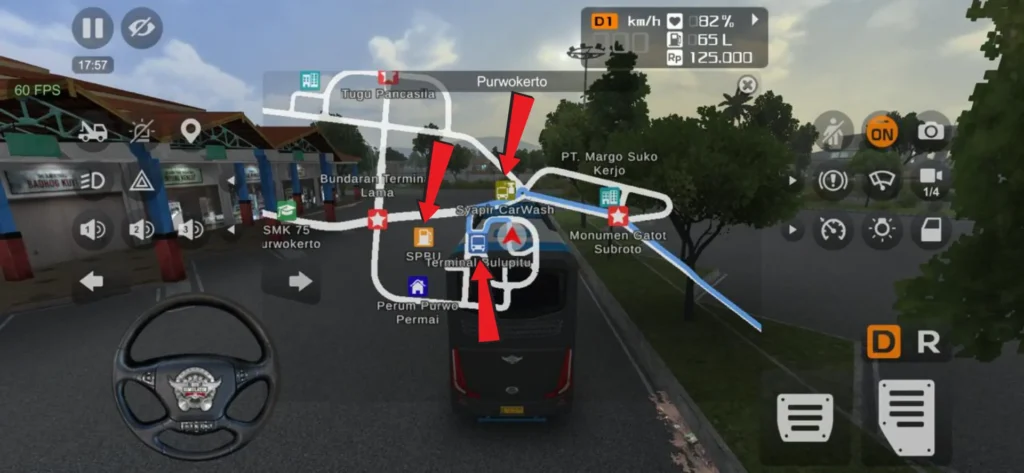
The option below it shows the complete route, meaning where you started your journey, where the bus is currently located, and where you have to go.
On the right side, you can see the plus and minus icons at the top. Clicking on the plus icon zooms the map in, while clicking on the minus icon zooms the map out. The option below it changes the map view, meaning you can switch the map between normal and 3D mode.
Driver Mode, Camera, and Selfie Features
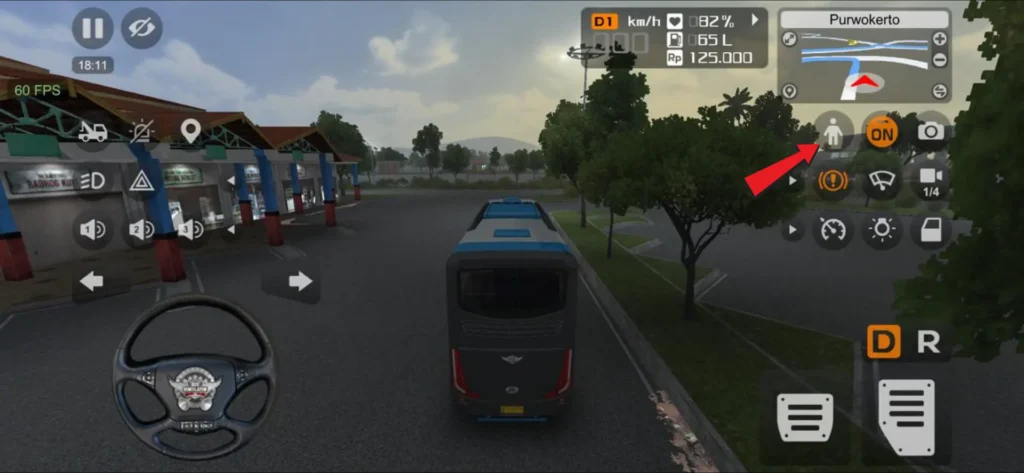
If you click on the driver option, your driver comes out of the bus. Before using this option, you need to click on the handbrake first. After that, you can freely move around outside the bus.
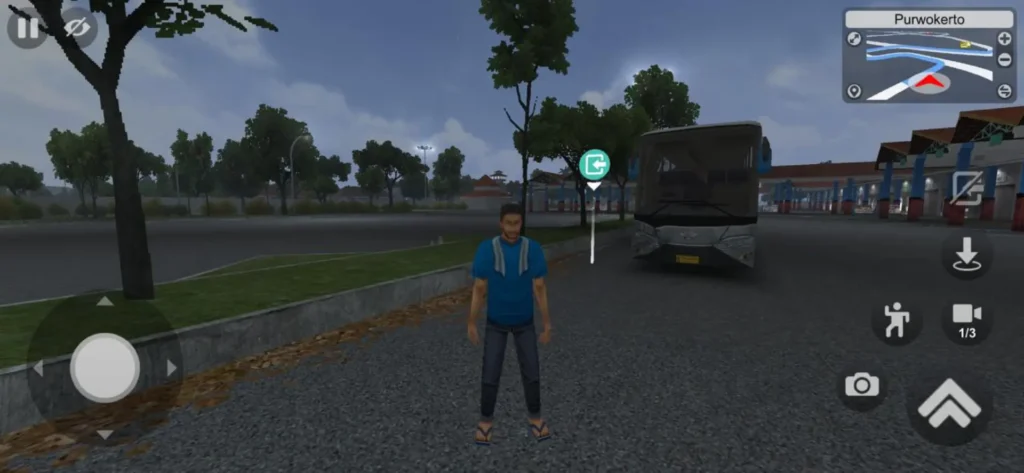
You can also see several extra options here. By clicking on the emote option, the driver starts dancing. The camera option changes the camera angle and lets you view the driver from different perspectives.
If you want to take selfies, you can use the selfie camera mode. It also includes different filters and effects that you can apply according to your preference.
The download/back option helps you quickly return near the bus if you move too far away from it. To enter the bus again, simply click on the upper option and the driver will go back inside the bus.
Engine Controls and Photo Mode
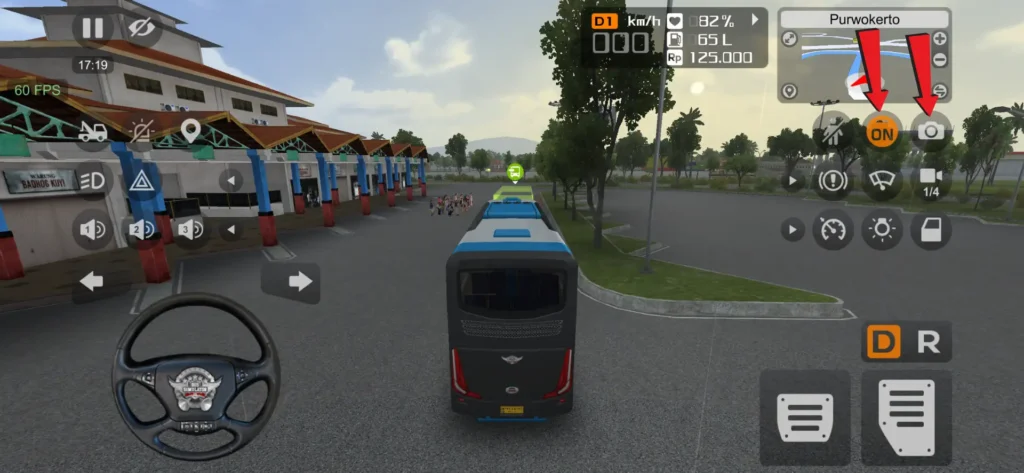
The ON button is used to start or stop the bus engine, while the photo mode feature next to it allows you to capture bus photos from different angles. It also includes features like zoom and blur, which you can use according to your preference.
Handbrake, Wiper, and Camera Angles
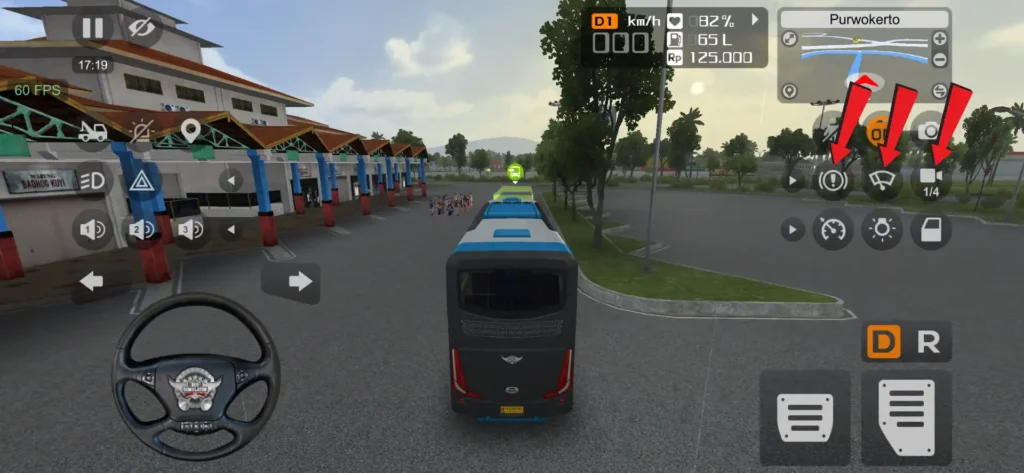
The handbrake is used to stop the bus in one place, especially when the bus is parked on a slope or uphill road. In such places, the bus may start moving automatically, but after applying the handbrake, it stays in its position.
The wiper control helps remove raindrops from the windshield. On the first press, the icon turns orange and the wiper runs at normal speed. On the second press, it turns red, which makes the wiper move faster, while pressing it again turns the icon white and switches the wiper off.
With the help of the camera angle feature, you can view the bus from different angles while driving. It includes four different camera views, which allow you to enjoy the gameplay according to your preference.
Cruise Control, Dipper, and Bus Gate
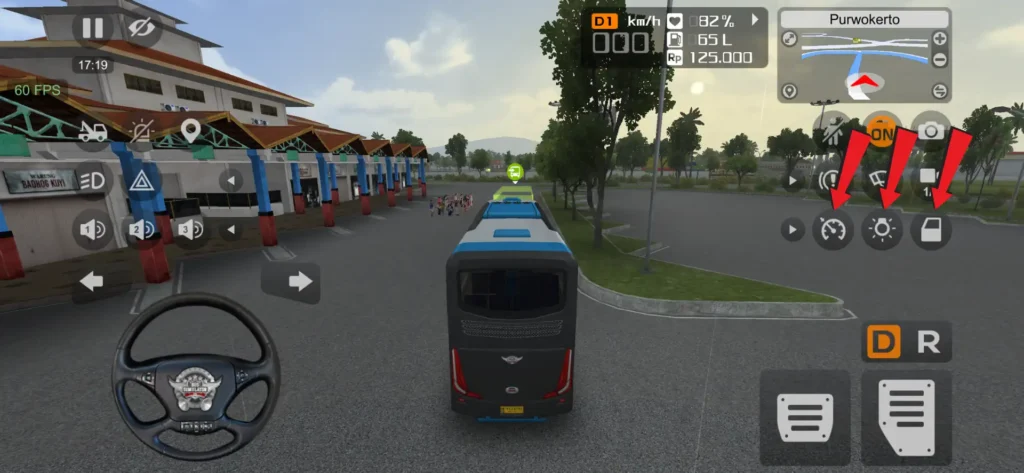
The purpose of cruise control is that after activating it at the same speed at which you are driving the bus, there is no need to keep pressing the accelerator continuously, and the bus keeps moving automatically. Even if you reduce the speed by applying the brake, the bus starts moving again at the same speed after releasing the brake.
By clicking on the dipper, your bus gives a dipper signal. If a vehicle is driving ahead of you and you want to get ahead, you can use the dipper, after which that vehicle moves to the side. This is its use.
The bus gate icon opens the side door of the bus, while pressing it again closes the door.
Bus Dashboard Information
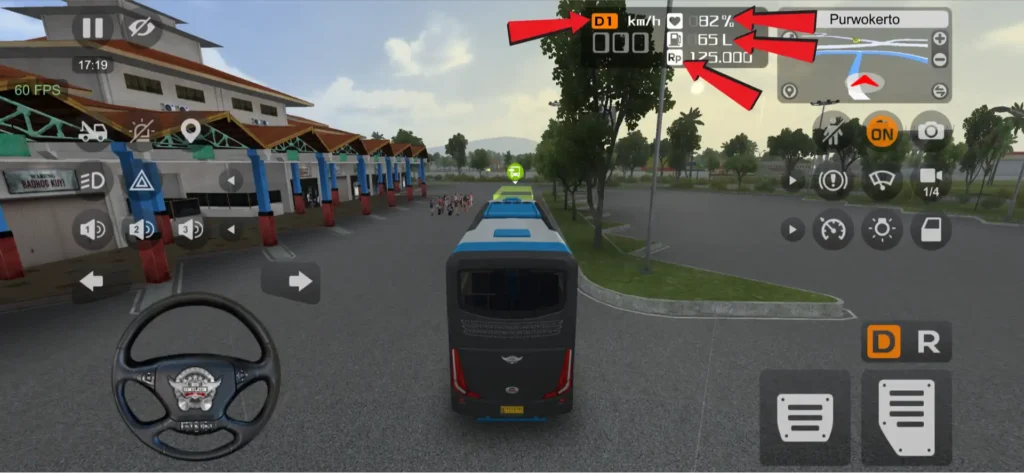
With the heart icon, the bus health is shown in percentage. As it keeps decreasing, the speed and performance of the bus also start decreasing.
D1 shows the current gear of the bus. As the speed of the bus keeps increasing, it changes into D2 and then D3. These are the gears of the bus.
The Rp icon shows the current game balance, while the number next to the fuel icon shows how much fuel is currently available in the bus.
Conclusion
Understanding the different buttons and controls available in Bus Simulator Indonesia is very important for better driving. With the help of these features, not only can the bus be controlled easily, but the gameplay also feels more interesting and closer to reality. If you learn to use all these controls properly, you can enjoy the game in a much better way.