How to Add Indian Truck in Bus Simulator Indonesia (BUSSID)
Want to add an Indian truck in Bus Simulator Indonesia without dealing with complicated zip files or errors? This step-by-step guide will show you a simple way to add an Indian truck and apply its skin without any complicated steps.
Check Your Garage Before Adding a Truck
Before adding a new truck in the game, it’s a good idea to check your existing vehicles.
- Open the Garage
- View your current vehicles (bus, truck, etc.)
- This helps you confirm that the new truck is added successfully
Download Mod BUSSID App
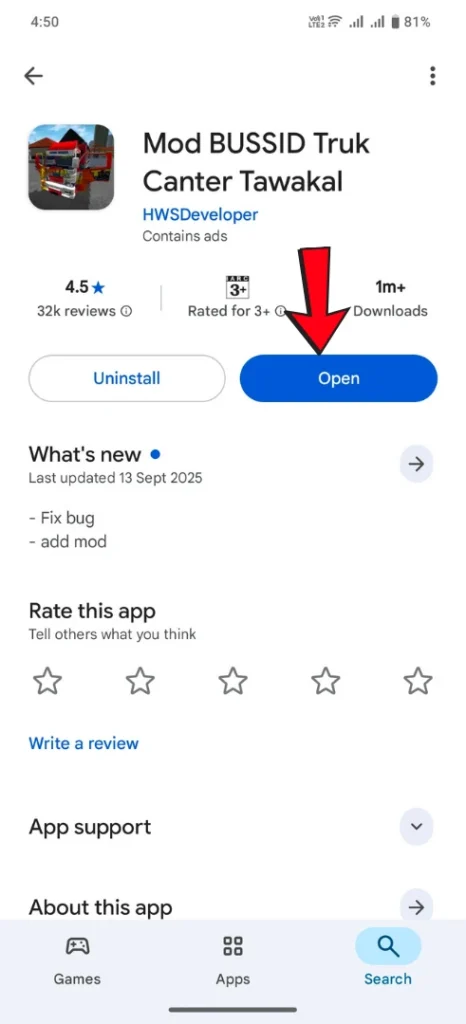
To add any vehicle, you first need a mod app. You can easily find it on the Google Play Store and install it within a few seconds.
- Open Google Play Store
- Search for MOD BUSSID
- Install the app (usually the first result)
- Open the app after installation
Choose an Indian Truck
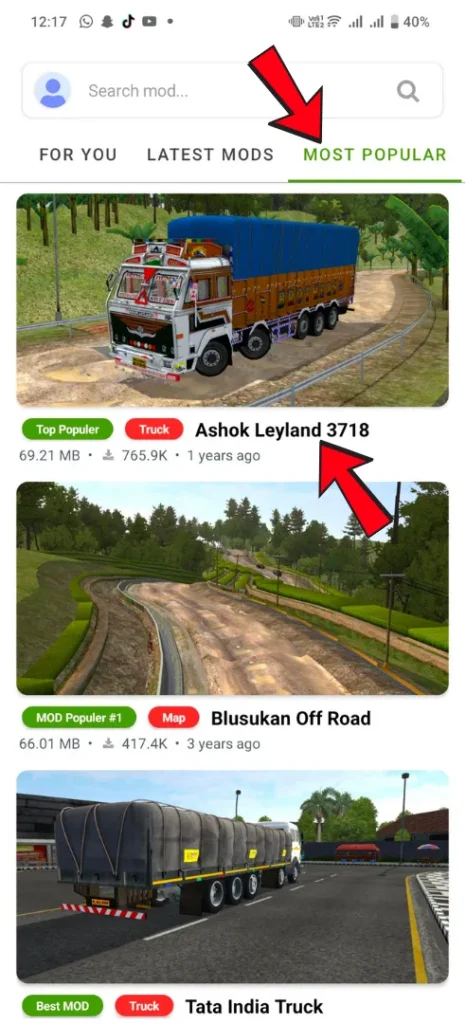
After opening the app, you will see many different types of vehicles available that you can add to your game.
- Open the app
- Go to the Most Popular section
- Browse available vehicles (Bus, Truck, Car, Bike)
- Select an Indian truck (e.g., Tata or Ashok Leyland) and add it
Install and Add the Truck
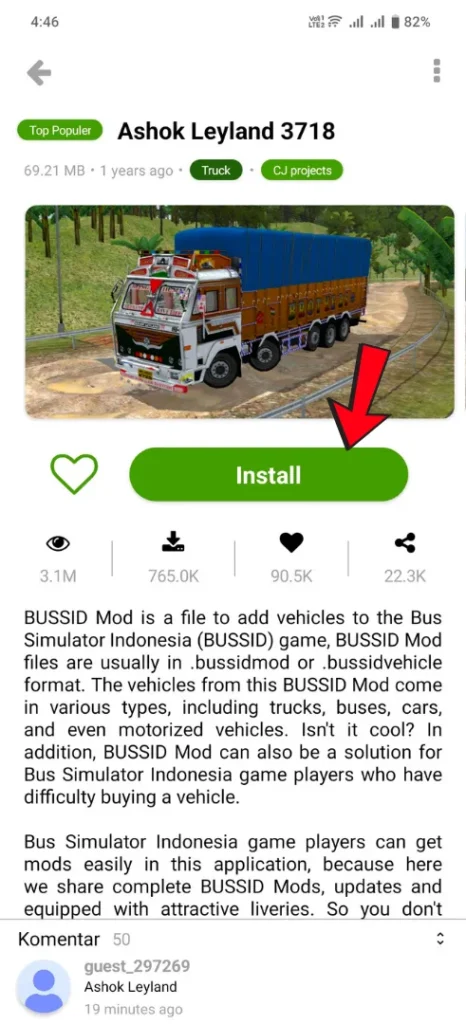
After selecting the truck, you will see the Install option. Tap on it to start downloading the file (around 69.21 MB).
- Tap on Install to begin the download
- Wait for the installation to complete
- Open the game after installation
Inside the game, follow these steps:
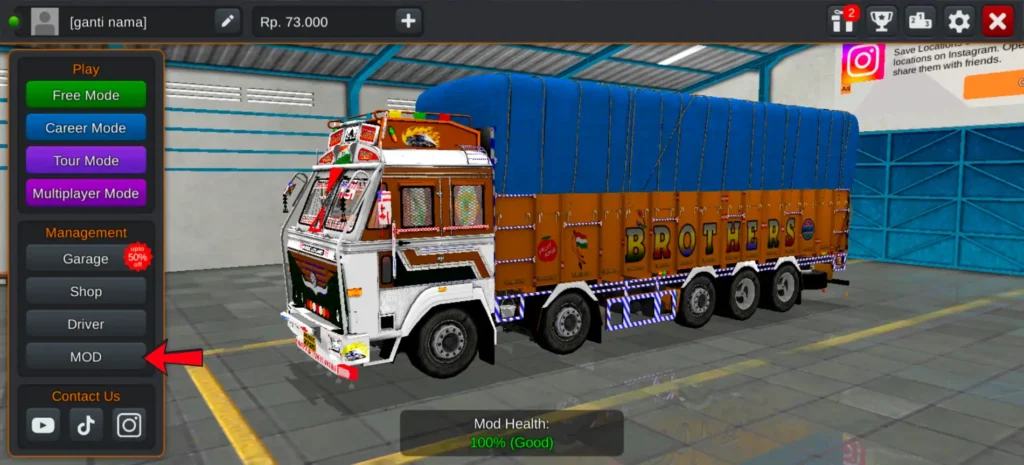
- Go to the Mod option on the left side
- Tap on it and a popup will appear
- Tap on the Choose option
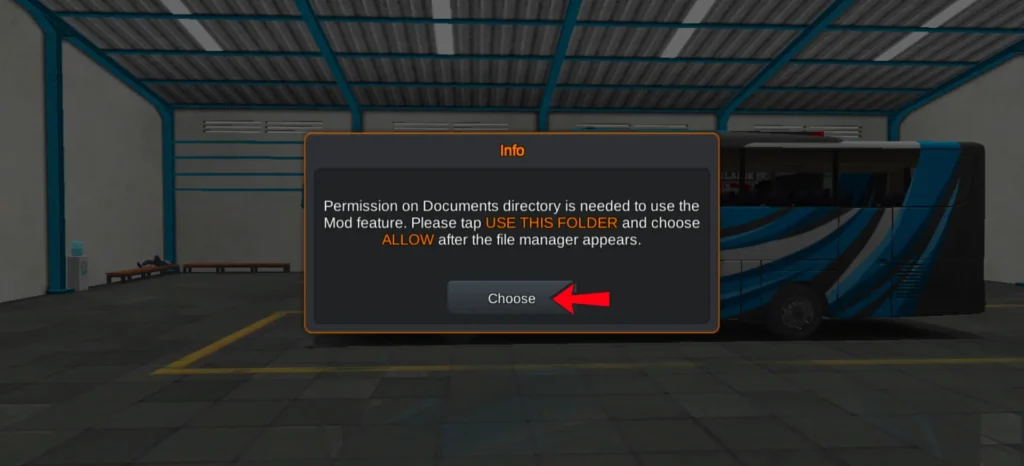
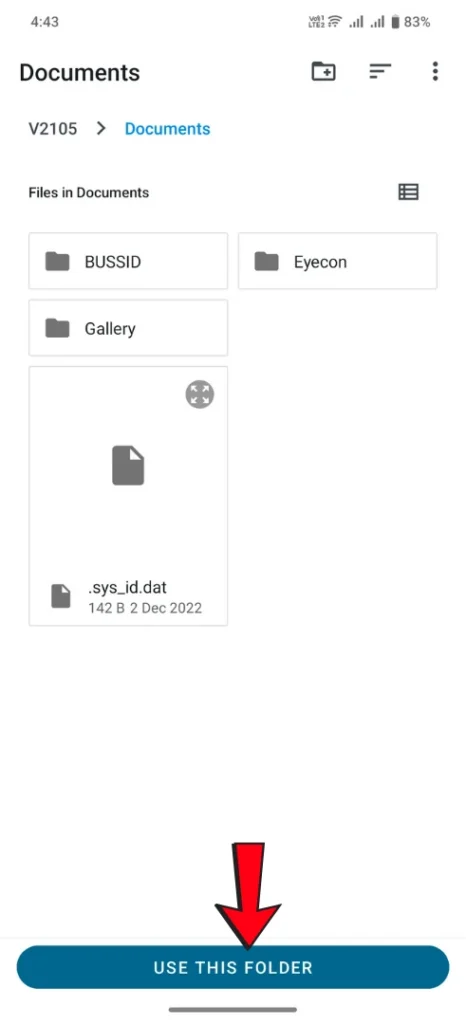
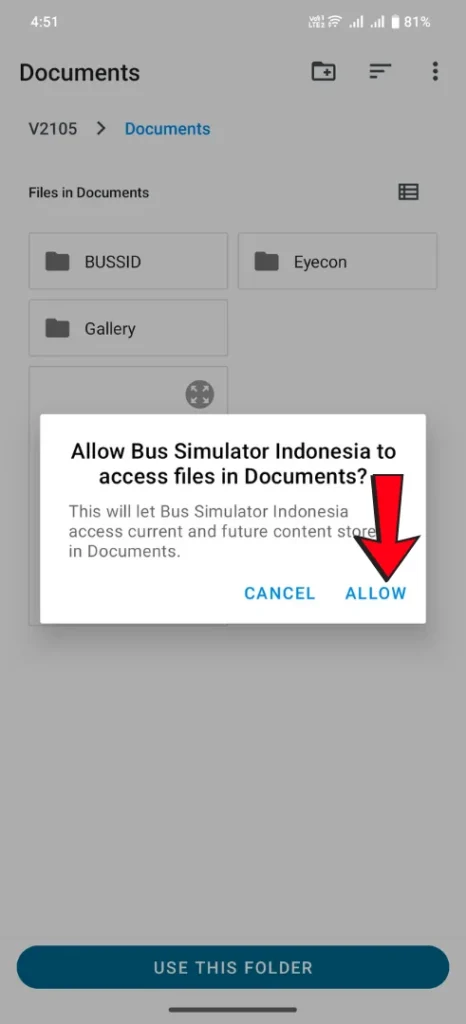
You will then be asked for permission. Tap on Allow to continue.
- Tap on Use this folder (you will see this option at the bottom of the screen).
- Tap on Allow to grant access to files in the Documents folder.
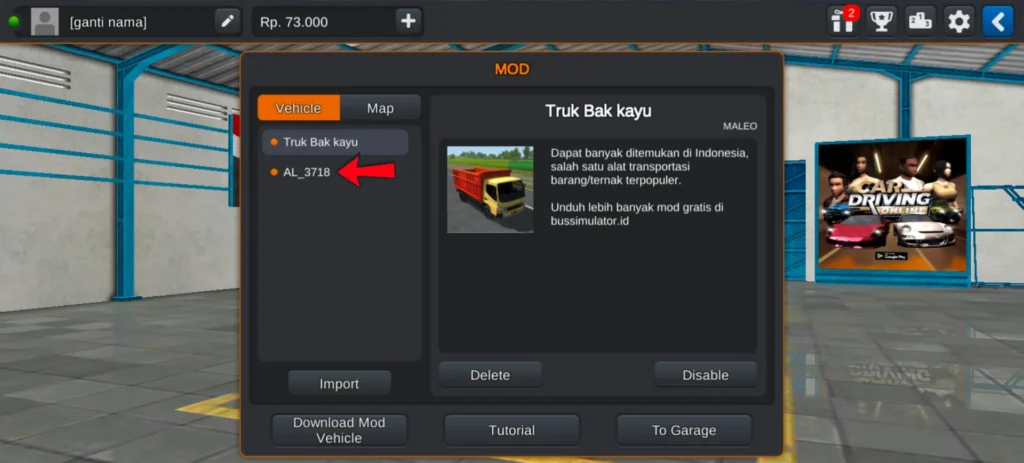
After allowing permission, the truck will be added to the mod list:
- It will appear with the name AL_3718
- Go to the Garage
- You will see the same truck there that you added
How to Apply Skin (Livery) on Indian Truck in BUSSID
Your truck has been added successfully. Now apply a skin (livery) to make it look more attractive and realistic.
Download the Skin
- Go back to the same app from where you downloaded the truck
- Select your Indian truck
- Scroll down on the truck page
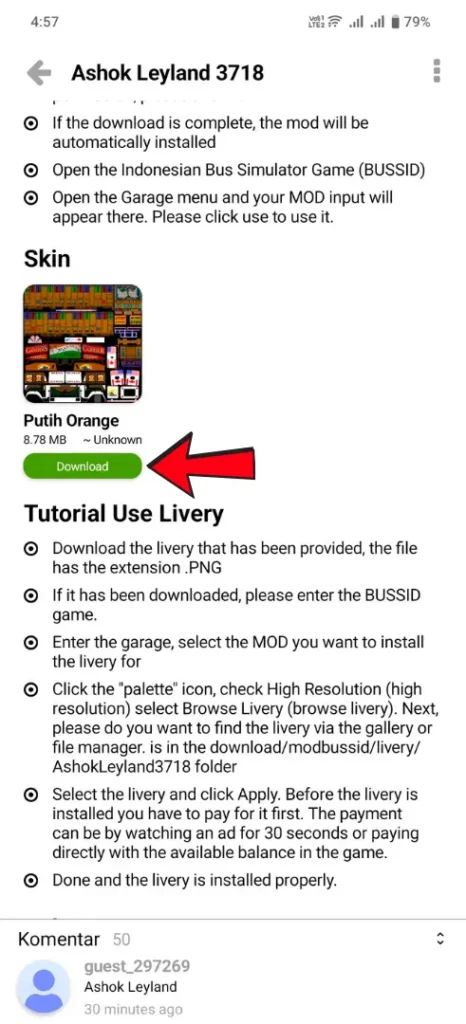
- You will see the Download Skin/Livery option
- Download the skin (size will be around 8.78 MB)
Open Garage and Select Your Truck
- Open the game
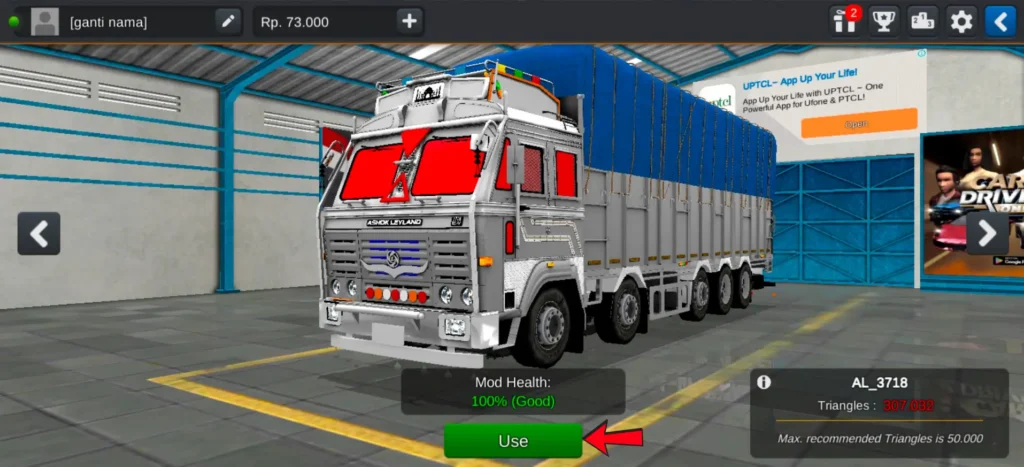
- Click on Garage
- Slide and select your truck
- Tap on Use
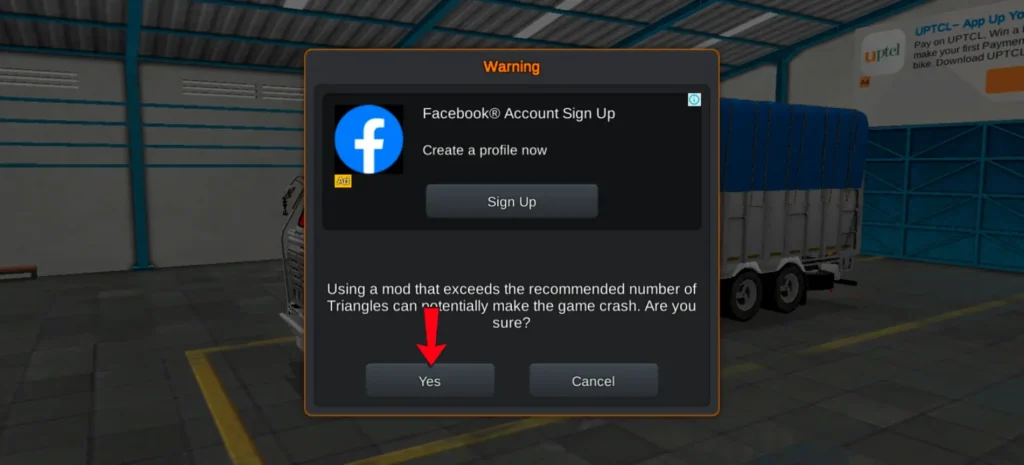
- A popup will appear → click Yes
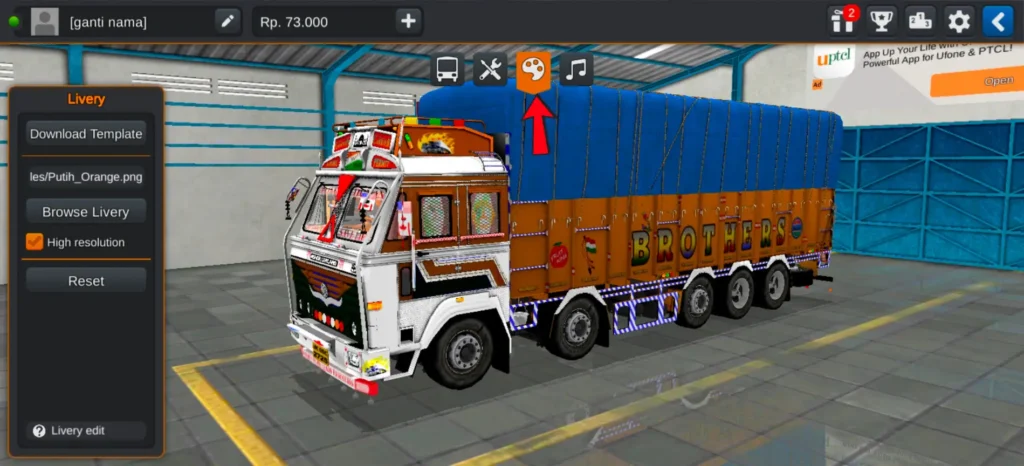
Open Livery (Skin) Option
- Click on the Skin / Livery option at the top
- It will ask for permission → select Allow All
Browse Livery and Select Source
- On the same screen where you opened the Skin (Livery) option, you will see the Browse Livery option on the left side
- Click on Browse Livery
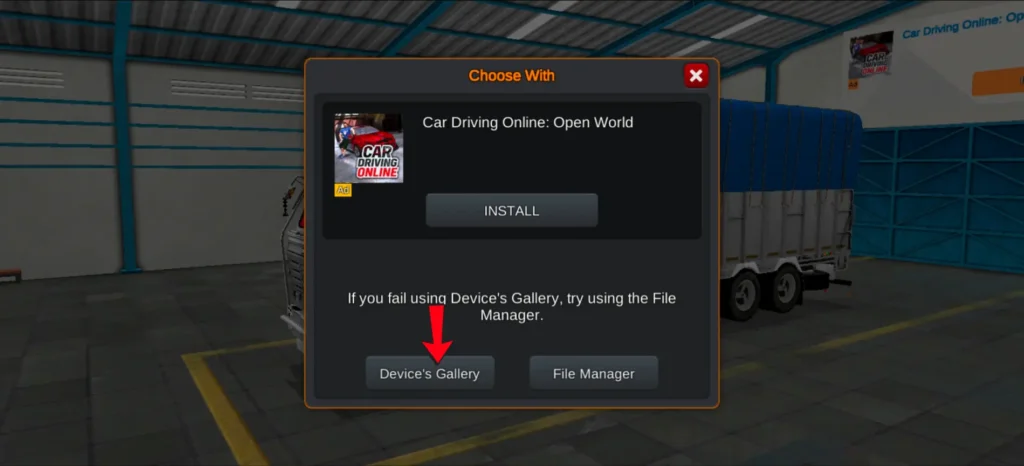
- It will ask you to choose:
- Device Gallery
- File Manager
Select Device Gallery
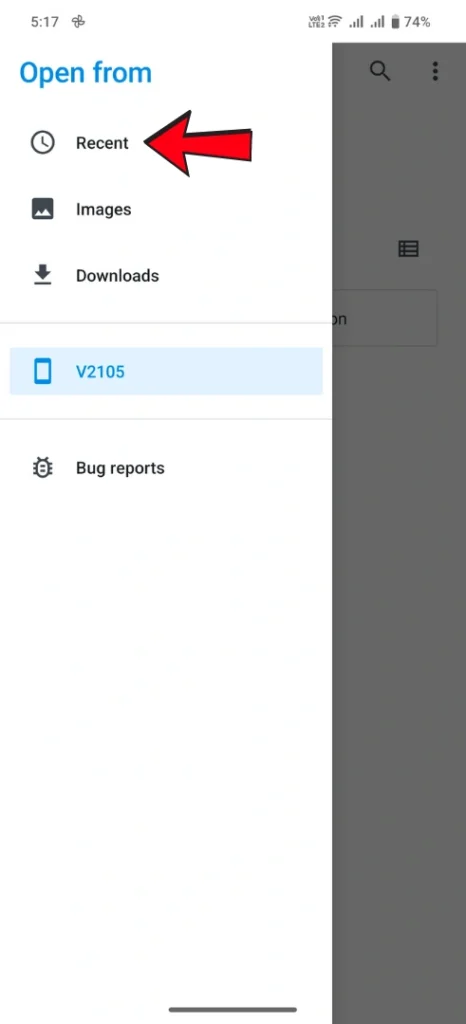
- The gallery will open
- Click on the 3 dots (top left side)
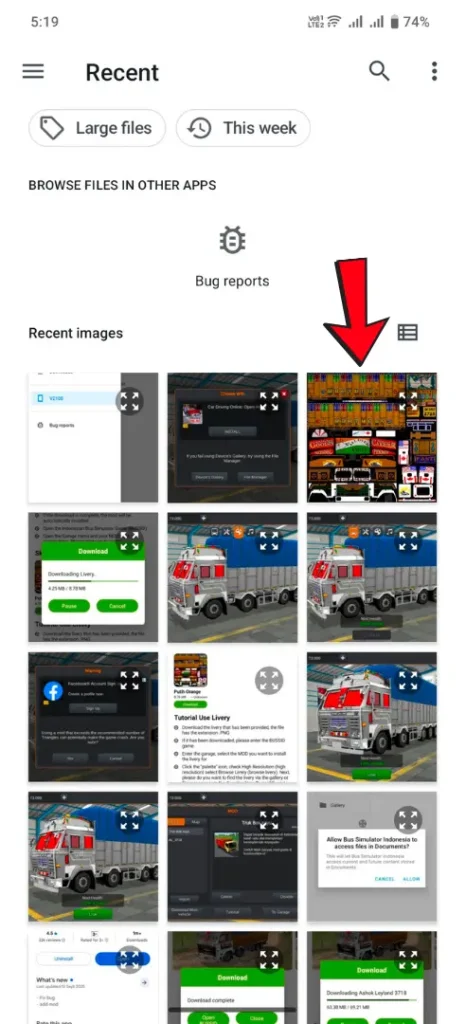
- Open Recent
- You will see your downloaded skin
- Tap on the skin
The skin will be applied to your truck instantly.
Apply High-Resolution Skin (Optional)
On the same screen where the Skin (Livery) option is open, you will see the High Resolution option along with Browse Livery. Enable High Resolution, then click on Apply.
A popup will appear where you can improve the skin quality in two ways:
- Watch an ad to apply it for free
- Or spend 15,000 in-game money
This will make your truck skin look clearer and higher quality.